
Roblox UGC Validation Errors: Why Uploads Fail and How to Fix Them
You export your accessory, open Studio, hit upload — and get a wall of text about cage vertices. You fix what you think it means, pay the 80 Robux, and the submission fails anyway.
That sequence is the single most common story on the Roblox creator forums, and it is expensive in a way most guides never mention: the upload fee is charged per submission, not per success.
This guide does three things. First, it collects what creators actually get stuck on, in their own threads. Second, it answers each one against Roblox's current official specifications — with the exact error strings, so you can match them to what Studio shows you. Third, it shows how to catch the blockers in a browser before you ever open Studio.
What creators are actually stuck on
Four patterns dominate the Developer Forum and they are not the ones most tutorials address.
You pay before you know. In one widely-corroborated thread, a creator's shoulder accessory passed validation, took the Robux, then failed submission with a mesh-scale error — repeatedly, until roughly 4,000 Robux had disappeared with no matching transaction record. Two other creators confirmed the same experience in replies. Whatever the underlying bug, the lesson generalizes: validation passing is not the same as your item going live, and the fee is gone either way.
The error text doesn't tell you what to do. A creator hit "Found the following instance tags which are not allowed" on accessories they believed were clean. They tried three different plugins. Months later someone identified the real cause: a plugin had silently attached tags to instances in the model. The error was technically accurate and practically useless.
Layered clothing dies on cages, over and over. Vertex counts that don't align between inner and outer cage, cage UVs that don't match the template, the garment poking outside its own outer cage. This isn't creator folklore — when Roblox rolled out stricter cage validation for layered accessories, it said outright that most of the problems it was seeing came from improperly set up cages.
The numbers contradict each other. Ask what texture size Roblox allows and you'll be told 1024, 2048, and 4096 by three different tutorials. All three numbers appear in the official docs. They just describe different things, which we'll settle below.
The part almost nobody knows: most checks can't block you
Roblox's validation system publishes 16 named visualization checks, all prefixed Measure_. Creators tend to treat every yellow item as something they must fix before uploading. That's not how it works.
Eight of the sixteen can block your upload. The other eight are advisory and never block it.
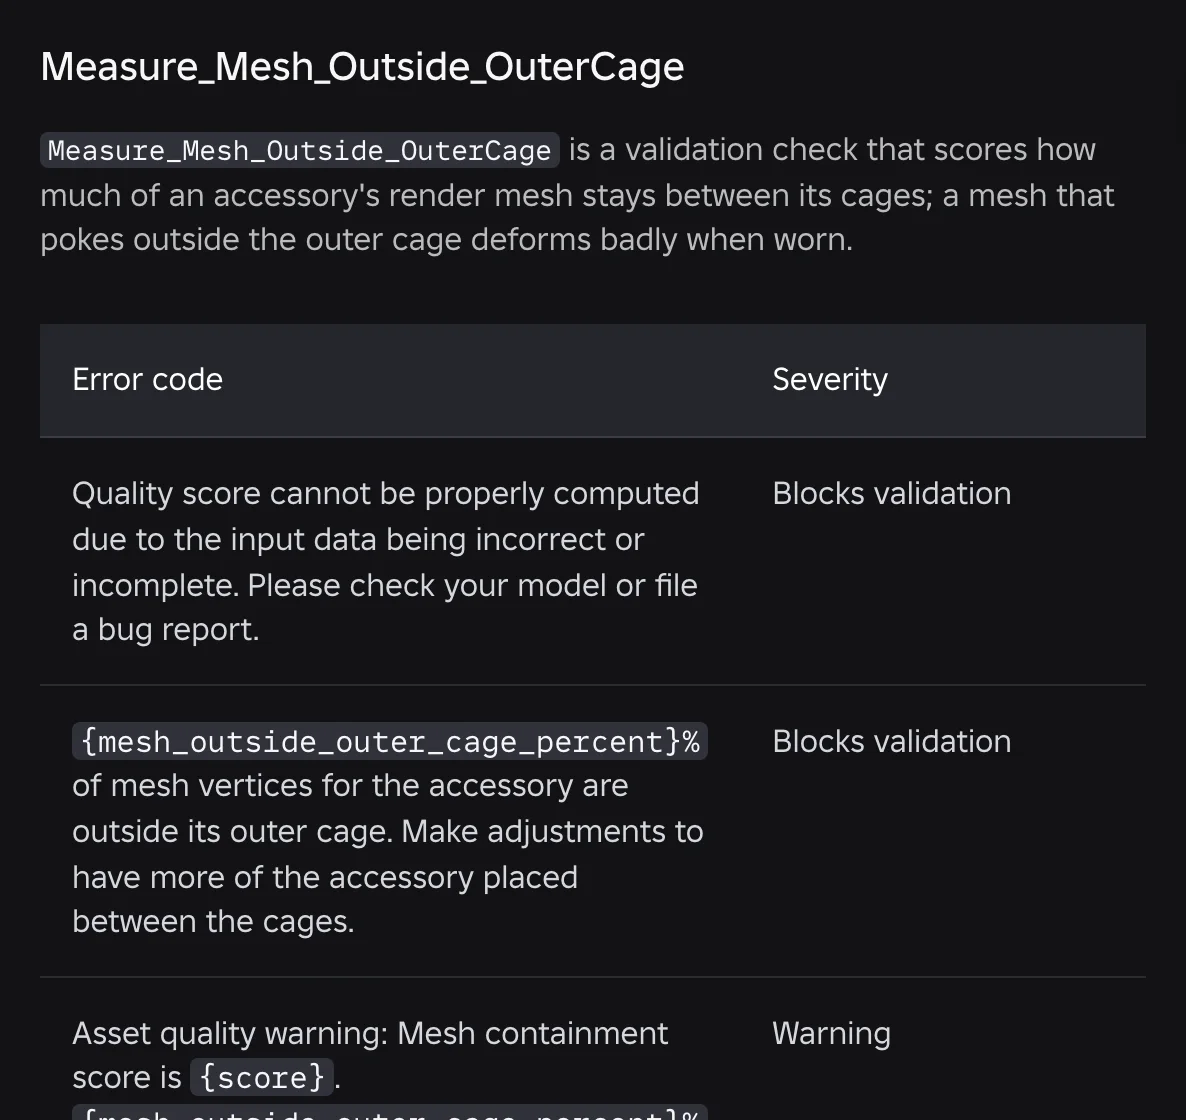
Here is the split, straight from Roblox's documentation:
| Check | Can it block your upload? |
|---|---|
Measure_Cage_Distance_Head |
Blocks validation |
Measure_Cage_Mesh_Distance |
Blocks validation |
Measure_Cage_Mesh_Distance_Avatar |
Blocks validation |
Measure_Cage_Relevancy |
Blocks validation |
Measure_Cage_UV |
Blocks validation |
Measure_Cage_UV_Avatar |
Blocks validation |
Measure_Mesh_Outside_OuterCage |
Blocks validation |
Measure_Dynamic_Head |
Blocks validation |
Measure_Degen_Triangles |
Warning only |
Measure_Joint_Number |
Warning only |
Measure_Mesh_Manifold |
Warning only |
Measure_Texture_Complexity |
Warning only |
Measure_Texture_Resolution |
Warning only |
Measure_Triangle_Intersection |
Warning only |
Measure_UV_Bound |
Warning only |
Measure_Vertex_Similarity |
Warning only |
Read that list again and the pattern jumps out: seven of the eight blocking checks are cage checks — cage-to-mesh distance, cage UVs, cage relevancy, and mesh containment. The eighth, for dynamic heads, is about head caging and facial-animation data. Degenerate triangles, self-intersections, manifold problems and low-complexity textures are all quality scores. They can hurt how your item is treated, but they will not stop the upload.
One important caveat, because it trips people up: this table is about the sixteen Measure_ quality checks only. The hard specification limits — triangle budget, texture cap, single mesh, watertight geometry, material settings — are enforced separately by the validation categories below. Measure_Texture_Resolution being advisory does not mean texture size is unlimited.
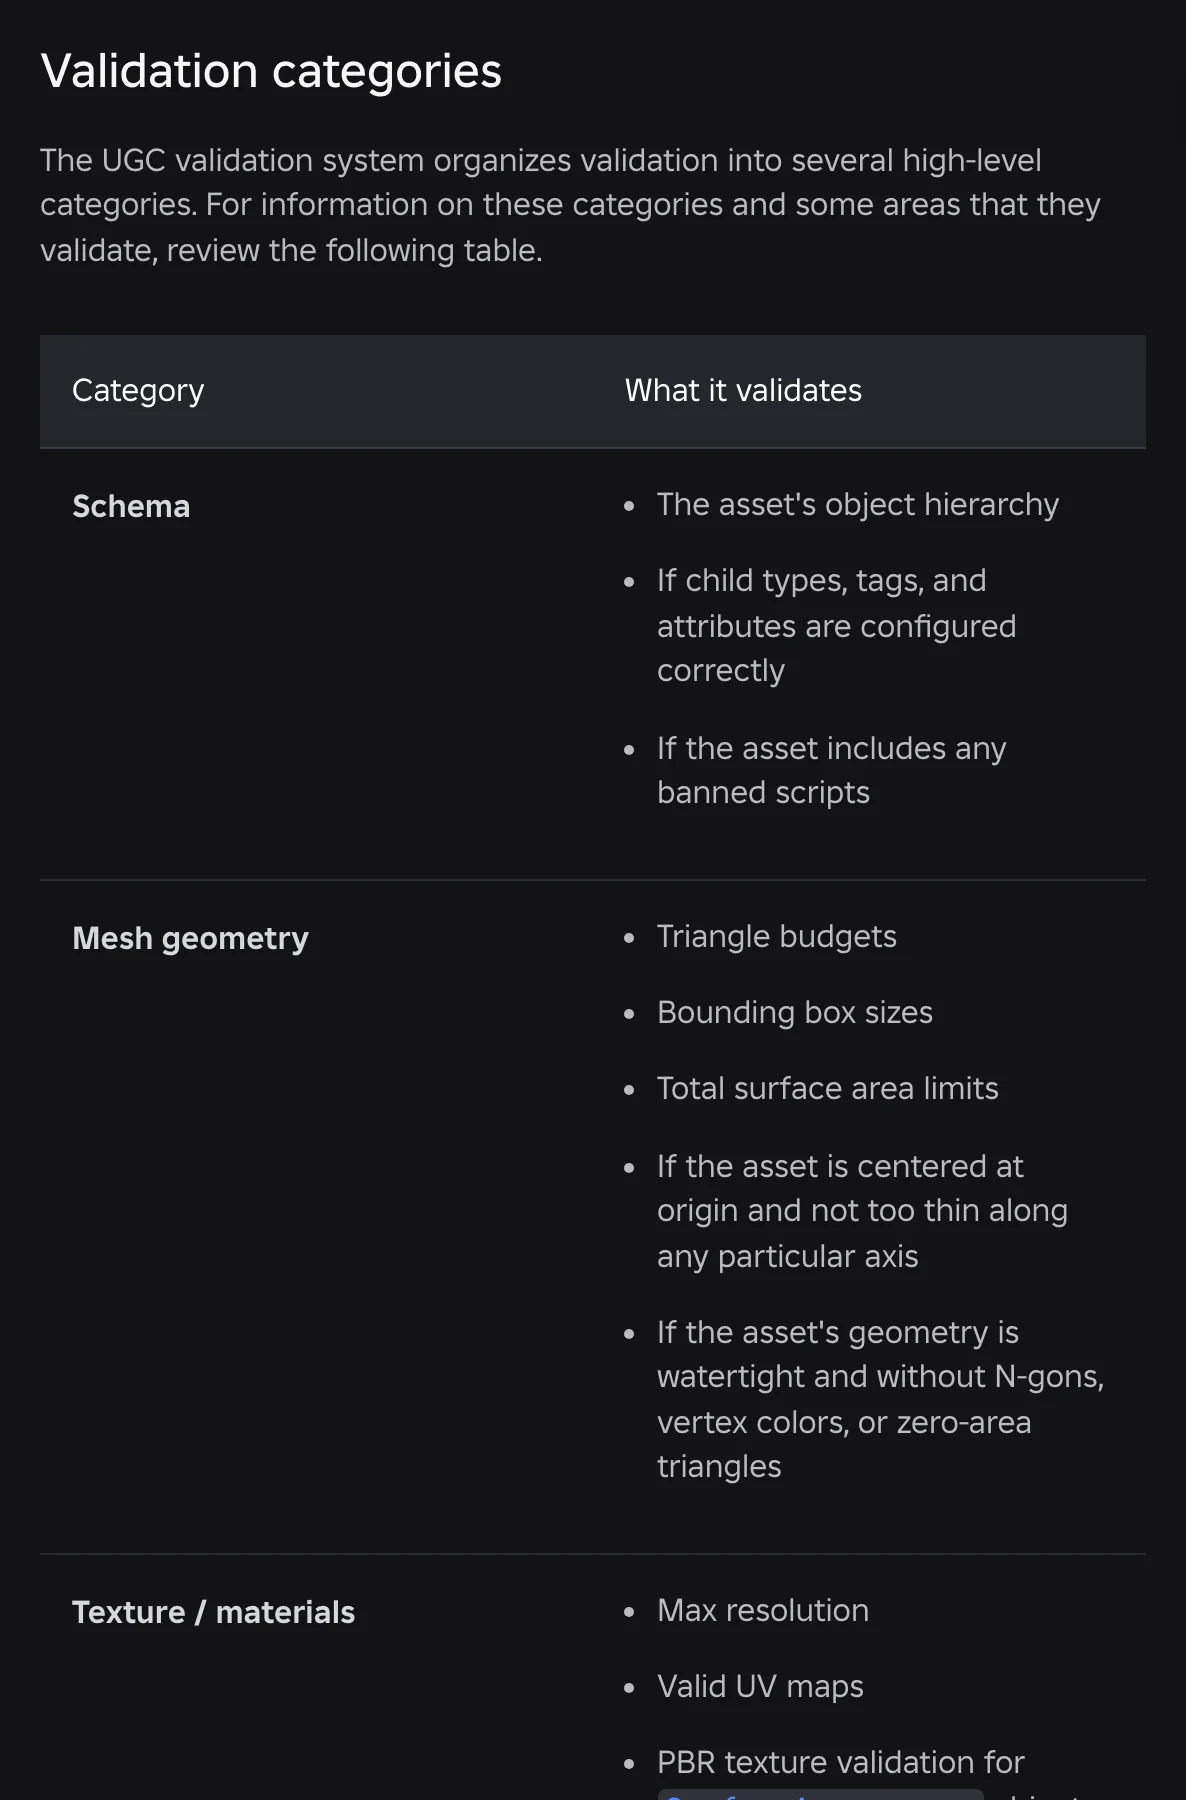
The specifications, settled
These are the current numbers from Roblox's own specification pages. Where creators usually get conflicting answers, the resolution is in the notes.
Rigid accessories — hats, hair, gear
| Requirement | Value |
|---|---|
| Triangles | 4k maximum |
| Mesh | Must be a single mesh |
| Geometry | Watertight, no exposed holes or backfaces |
| Texture | 2048×2048 maximum for Marketplace assets |
| Material | Plastic |
| Transparency | 0 |
| VertexColor | Default 1, 1, 1 |
| Attachment | Exactly one, using the standardized name for its type |
| Skinning | Rigid accessories must not include skinning data |
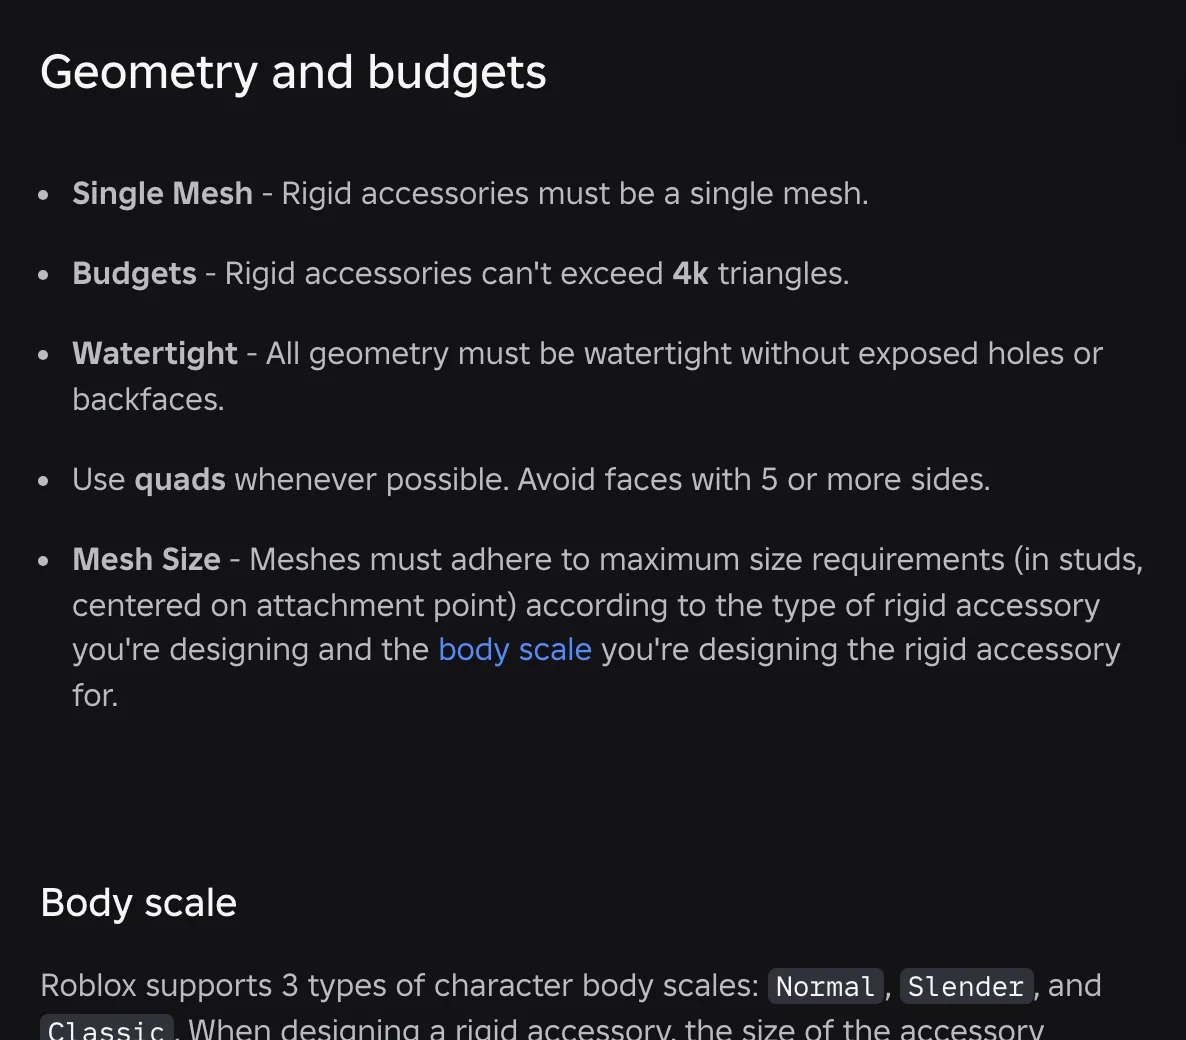
Bounding boxes are defined per attachment point and per body scale, so a hat has a different allowance from a back accessory, and Classic proportions differ from Rthro. If you are told your mesh is too large, that is the table to check — not the triangle count.
Layered clothing — shirts, pants, jackets, dresses
| Requirement | Value |
|---|---|
| Triangles | 4k maximum |
| Mesh | Must be a single mesh |
| Mesh size | 8 × 8 × 8 studs for tops and bottoms; 1.5 × 0.5 × 0.5 for eyebrows and eyelashes |
| Texture | 2048×2048 maximum for Marketplace assets |
| Cages | Both an inner cage and an outer cage are required |
| Cage naming | Model name plus _InnerCage and _OuterCage |
| Skinning | Weighted to an R15 rig, maximum 4 joint influences per vertex |
| Material | Plastic, Transparency 0, VertexColor 1, 1, 1 |
| Extras | No Script or extra Part objects inside the Accessory |
Settling the texture argument
All three numbers you've seen are real, and they answer three different questions:
- 4096×4096 — what the Roblox engine supports for mesh textures in general.
- 2048×2048 — the hard cap for Marketplace accessory and layered clothing textures. This is the one that matters for UGC.
- 1024×1024 — the maximum for PBR texture maps used by
SurfaceAppearance.
If you are uploading a UGC item, target 2048 or below. Higher-resolution textures are downscaled automatically for performance anyway, so a 4K source buys you nothing on an avatar accessory and can lose you detail.
Cages: where layered uploads actually die
Since seven of the eight blocking checks are cage checks, this is where your attention belongs.
A layered garment carries two invisible meshes. The inner cage defines the surface that stretches over the body underneath. The outer cage defines the surface that other garments stretch over when worn on top of yours. Roblox ships template cages, and the outer cage starts identical to the inner one — you edit the outer cage outward until it fully covers your garment, and you leave the inner one alone.
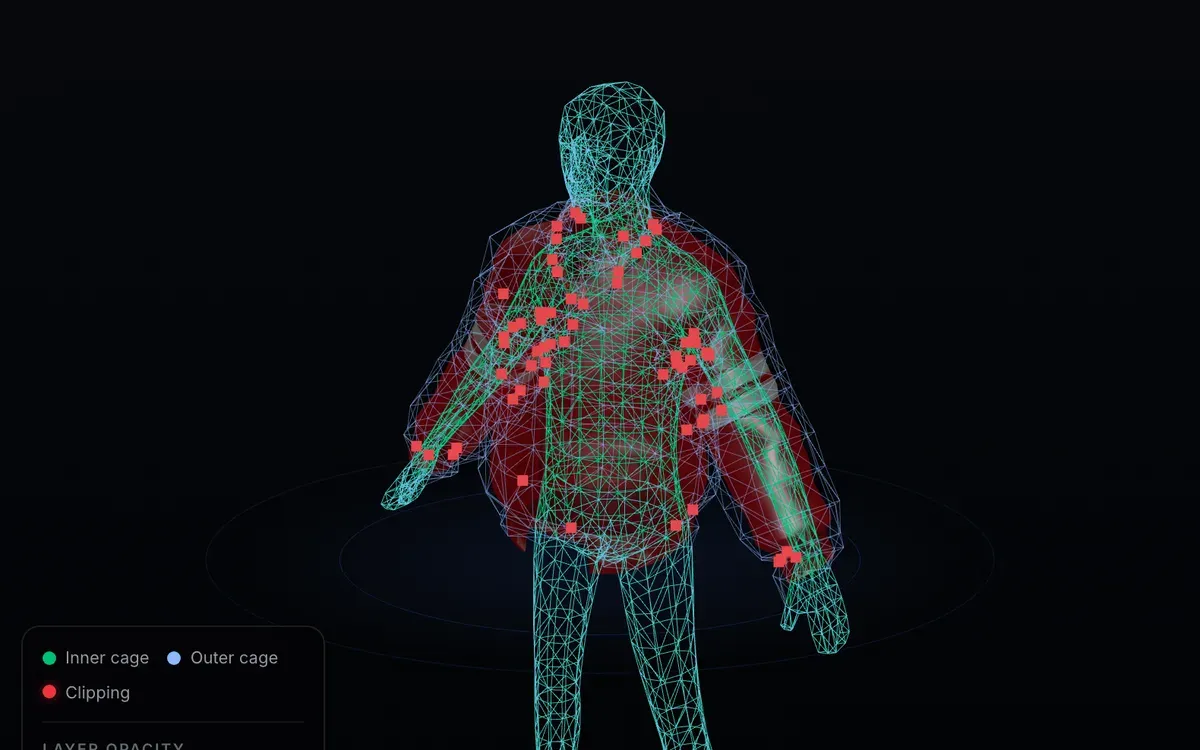
Four rules cause most of the failures:
Never delete cage vertices or UVs. Roblox's documentation is explicit that the vertices and UVs of the inner and outer cages must not be deleted or removed, because they are used to match coordinates between cages. Deleting the parts you "aren't using" is the single most common self-inflicted wound — it breaks Measure_Cage_UV and the vertex-count alignment at once.
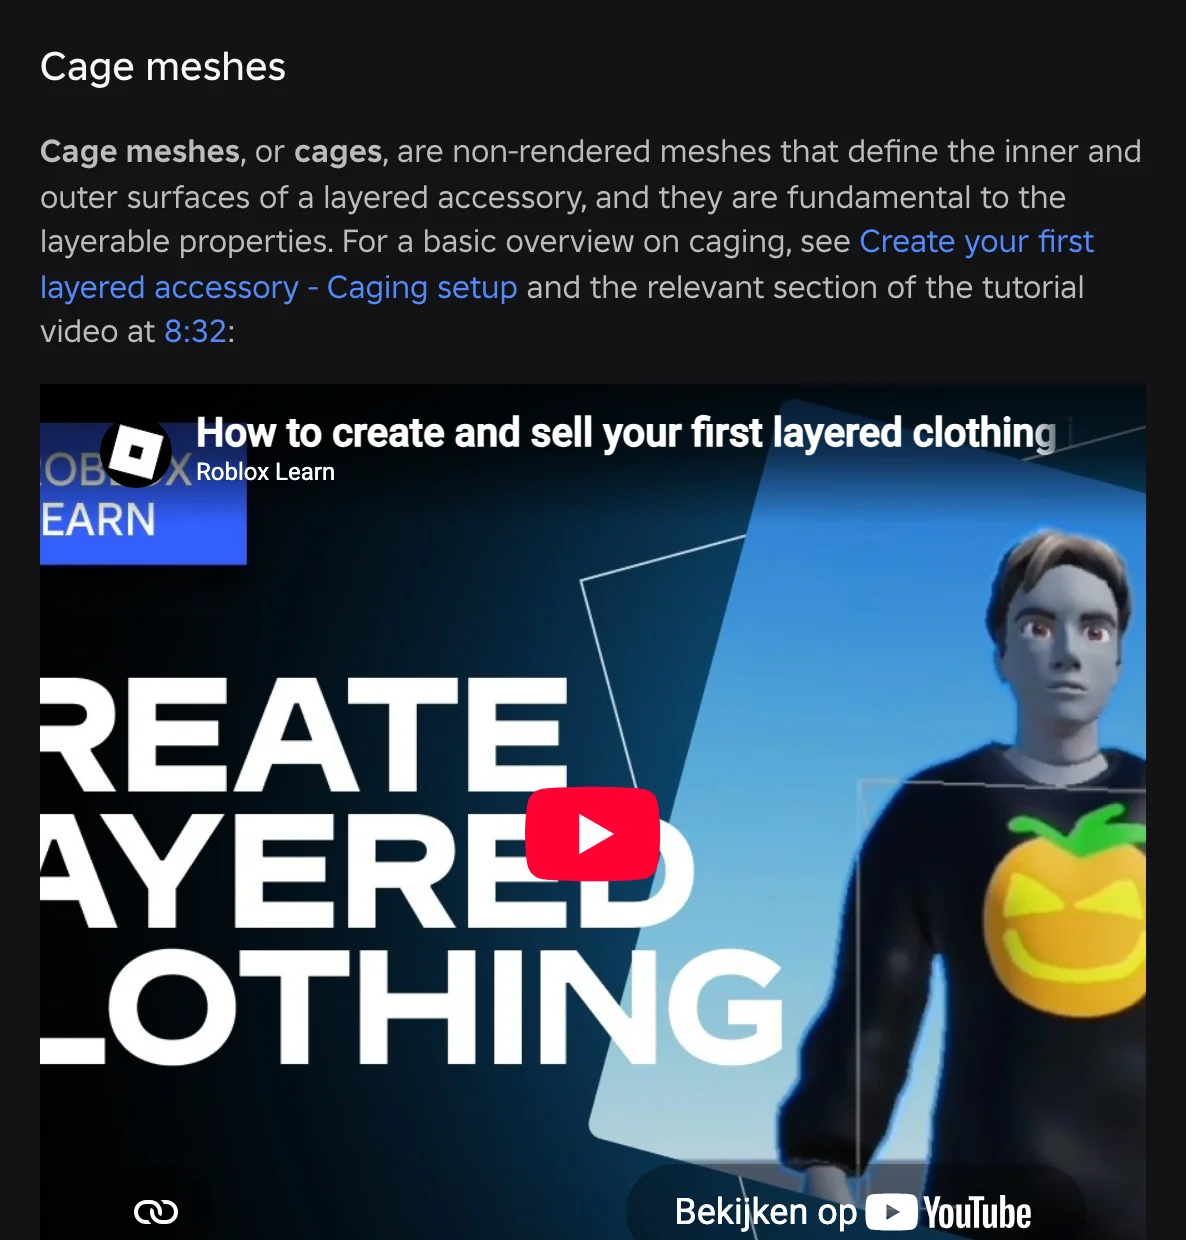
Keep the mesh inside the outer cage. If part of your garment pokes through, Measure_Mesh_Outside_OuterCage reports the percentage of vertices that escaped and blocks the upload. The fix is to push the outer cage out over the offending area, not to shrink your model.
Don't let the cage float or sink. Measure_Cage_Mesh_Distance blocks in both directions — a cage that drifts too far from the render mesh, and a cage whose vertices sit inside it. It wants a snug fit.
Only move the cage where the garment needs it. Measure_Cage_Relevancy measures how much of your cage editing actually sits over the accessory. Dragging large regions of cage around "just in case" is what triggers it.
Naming, exactly
The inner cage mesh object must be your accessory model's name with _InnerCage appended. The outer cage must be the same name with _OuterCage. Not InnerCage, not Inner_Cage, not a name you invented. Roblox matches on this convention, and a rename is enough to make a perfectly good pair of cages invisible to the importer.
Roblox now has an in-Studio checker — and its limits
On 29 June 2026, Roblox shipped Visualizing UGC Validation as a Studio beta. Select a body, dynamic head, rigid accessory or layered accessory, run it, and errors and warnings appear with visual overlays in the viewport showing you where the problem is. It is a genuine improvement and worth turning on.
To enable it: File → Beta Features → Visualizing UGC Validation, restart Studio, add a custom tab in the toolbar, add the UGC Validation tool, then select your asset and run validation.
Two honest limits. It does not repair anything — it tells you what is wrong and leaves the fixing to you. And it lives inside Studio, which means the model already has to be exported, imported and set up before you learn that the cages were wrong. For a lot of creators, the failure they most want to catch happens before that point.
Catching it before Studio
This is the gap the Roblox UGC Requirements Checker fills. You drop in a GLB, GLTF or FBX in a browser, pick accessory or layered clothing, and about thirty seconds later you get a red / amber / green report — 17 checks for layered clothing, 11 for accessories — with a plain-language fix under every item that fails.
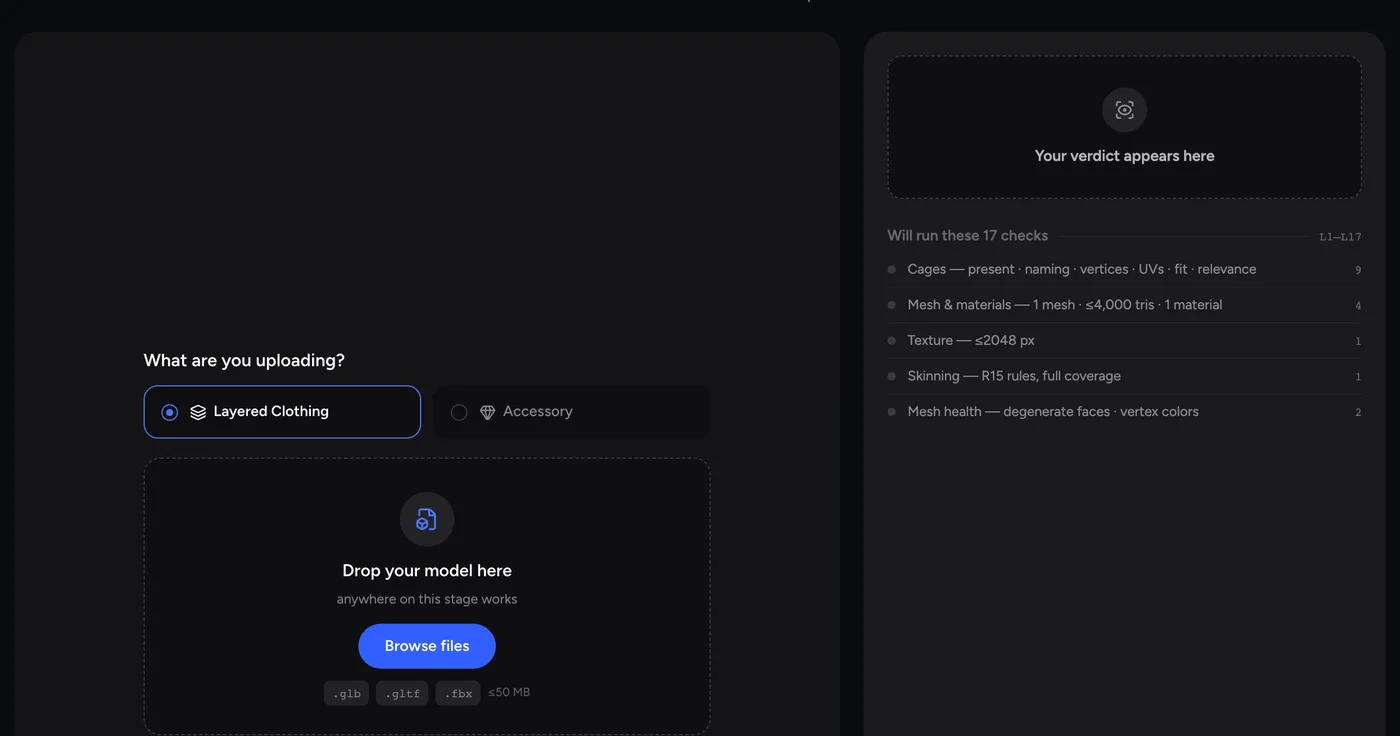
The checks are grouped the way the failures actually cluster: cages (present, named correctly, vertex counts, UVs, fit, relevance), mesh and materials (single mesh, 4,000 triangles, one material), texture size, R15 skinning coverage, and mesh health. You can X-ray the inner and outer cages against your garment, which is how the image earlier in this article was produced.
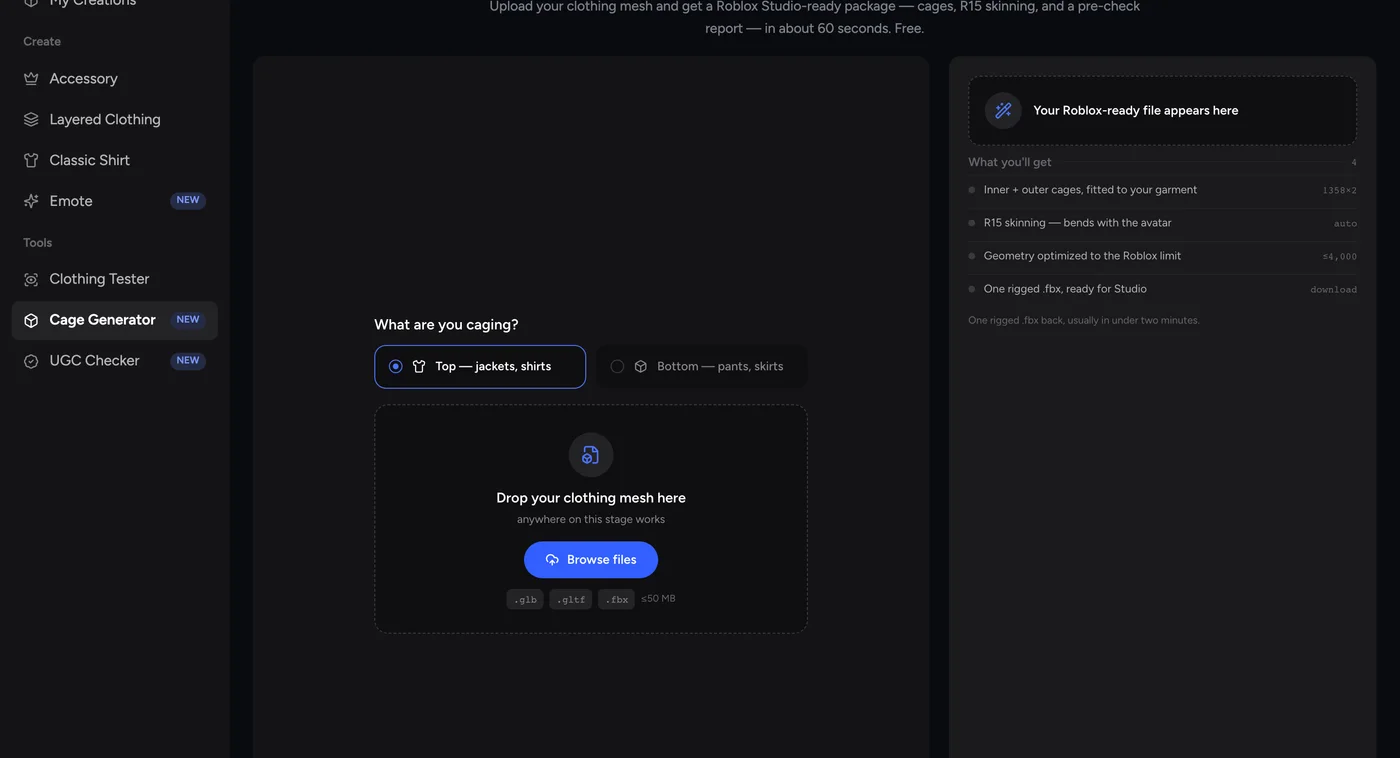
When the report says your cages are missing or broken — which, given the numbers above, is where most layered clothing lands — the Cage Generator rebuilds them: inner cage, outer cage and R15 skinning, fitted to your garment, returned as a rigged .fbx. Then you bring that file back to the checker and confirm it's green.
If you are starting from scratch rather than repairing an existing file, the Roblox Accessory Maker and the Layered Clothing Maker generate models that already sit inside these limits.
One thing worth saying plainly: a pre-check is an approximation. Roblox's validation at upload is the authoritative one, and passing here is not a promise that moderation will approve your item. What it does buy you is that you stop discovering geometry problems on the far side of a payment.
A pre-upload checklist
Run this before you spend anything.
- Single mesh, watertight, no exposed holes or backfaces.
- Under 4,000 triangles.
- One material, set to
Plastic, Transparency0, VertexColor1, 1, 1. - Texture 2048×2048 or smaller.
- Layered clothing only: both cages present, named
_InnerCageand_OuterCage, with no deleted vertices or UVs. - Layered clothing only: garment fully inside the outer cage; cage hugging the mesh, not floating or sunk.
- Layered clothing only: skinned to R15, maximum 4 influences per vertex.
- Rigid accessories only: no skinning data at all, exactly one correctly named attachment.
- Nothing extra inside the
Accessory— no scripts, no stray parts, no plugin-applied tags. - Budget the fee: 80 Robux per submission, plus the publishing advance for your category.
What it costs when you get it wrong
Roblox charges an upload fee of 80 Robux per submission, for any 2D or 3D item. On top of that, non-limited items carry a publishing advance by category:
| Category | Publishing advance |
|---|---|
| Classic clothing (t-shirt, shirt, pants) | 10 Robux |
| Hats, faces | 1,500 Robux |
| Hair | 1,000 Robux |
| Neck, shoulder, front, back, waist accessories | 1,000 Robux |
| Jackets, shirts, sweaters, pants, dresses, skirts, shorts, shoes | 600 Robux |
| Heads | 1,500 Robux |
| Emotes | 1,500 Robux |
| Bodies | 2,500 Robux |
That is the real argument for checking first. A failed cage isn't a five-minute fix and a retry — it's a fee you already paid, a Studio round-trip you have to repeat, and a queue you re-enter at the back.
Frequently asked questions
Why did my Roblox UGC fail validation?
Most blocking failures are cage problems. Of the 16 named validation checks Roblox publishes, 8 can block your upload — seven of them cage checks (cage-to-mesh distance, cage UVs, cage relevancy, mesh containment) and the eighth covering dynamic-head caging and facial-animation data. The other 8 are quality warnings that never block. Separately, hard spec limits like the 4k triangle budget, the 2048 px texture cap, single-mesh and watertight geometry are enforced by the validation system regardless.
What are the requirements for Roblox UGC?
Rigid accessories and layered clothing share the core limits: a single watertight mesh, no more than 4k triangles, textures up to 2048×2048, material set to Plastic with Transparency 0 and VertexColor 1, 1, 1. Layered clothing additionally needs an inner and an outer cage plus R15 skinning with at most 4 joint influences per vertex. Rigid accessories must contain no skinning data and exactly one correctly named attachment.
What texture size does Roblox allow for UGC?
2048×2048 is the cap for Marketplace accessories and layered clothing. The 4096 figure you may have seen is what the engine supports for mesh textures generally, and 1024 is the maximum for PBR texture maps used by SurfaceAppearance. For a UGC item, stay at or below 2048.
How many triangles can a Roblox UGC accessory have?
4k triangles is the maximum, and it applies to both rigid accessories and layered clothing. Exceeding it fails validation outright rather than producing a warning.
What does "mesh vertices are outside its outer cage" mean?
It means part of your garment sticks out past the outer cage that is supposed to contain it, and Roblox blocks the upload because the item deforms badly when worn. The fix is to move the outer cage outward over the area that is poking through — not to scale your model down.
Why can't I just delete the cage vertices I'm not using?
Because Roblox uses cage vertices and UVs to match coordinates between cages, and its documentation states they must not be deleted or removed. Trimming a template cage is one of the most common causes of cage UV and vertex-count failures.
Does Roblox have its own UGC validation checker?
Yes. Roblox released Visualizing UGC Validation as a Studio beta on 29 June 2026. Enable it under File → Beta Features, restart Studio, and add the UGC Validation tool to a custom toolbar tab. It highlights errors and warnings visually but does not fix them, and it requires your model to already be imported into Studio.
How much does it cost to upload UGC to Roblox?
80 Robux per submission as an upload fee, plus a publishing advance that depends on category — 10 Robux for classic clothing, 600 for layered garments, 1,000 for hair and most body accessories, 1,500 for hats, faces, heads and emotes, and 2,500 for bodies. The upload fee applies per submission, whether or not the item is accepted.
Does passing a pre-upload checker guarantee my item will be accepted?
No. A browser pre-check is an approximation of Roblox's rules, and Roblox's validation at upload is authoritative. Content moderation is a separate step again. What a pre-check does is catch the mechanical failures — cages, triangle counts, texture size, skinning — before they cost you a fee.